Posting my tutorials on Monday really give me some extra motivation to tackle at least one craft project. Hair bows are all the rage for little girls these days. I almost passed out the first time I saw that they charge between $6-$15 for a hair bow. I know that a big part of the cost is the ribbon and that they are time consuming to make...but still. So every now and then when I saw ribbon on sale or when I had my coupon with me and everything else I was buying was already on sale (couldn't use my coupon) I would pick up a roll of ribbon with the future intentions of someday stock piling some hair bows for Emily. Hopefully before she outgrew the hair bow phase.
Although there are a ton of patterns that you can pay for I searched the Internet for free tutorials on making hair bows and found very few. Turns out that it is kind of hard to "show" someone how to make one with pictures and words. This tutorial has 17 pictures and I still feel like looking back I could have added a few to make things more clear. Please ask questions if something doesn't make sense. Remember this is my first time so hopefully they will be cuter as I practice a few times.
Bow Recipe:
Alligator Clip
Hot Glue & Gun
Straight Pin
Threaded Needle
29 inch piece of 7/8'' grosgrain ribbon
4 1/2 inch piece of 3/8'' grosgrain

Start by measuring and cutting your ribbon.

For this bow I wanted to have the traditional "bow" ends. To make them somewhat even I folded the end of the ribbon in half and snipped the end.

Once this is completed you want to carefully heat seal the ends of the ribbon using a lighter or match. Be careful not to catch your ribbon on fire or burn yourself. For safety reasons I failed to get a picture of me doing this part :)
You know that the ends are heat sealed when you see a little edge of wax form on the very tip of the ribbon. This keeps the ends from fraying. Make sure to heat seal your smaller piece of ribbon as well.

Now you are ready to start making your bow. To start lay your ribbon right side down. Fold one end of the ribbon to the 3 1/2 inch mark. Place your finger in the middle of the loop to hold in place.

Now bring your other end of the ribbon back over and move your finger to hold the new layer in place. Make sure that when you bring the ribbon back over you just wrap over the end of the ribbon to make it even.

Continue to wrap the ribbon around. You should have three loops on each side of the center where your finger is. Stick your straight pin to hold the bow in place.

Now spread the three loops out.

Now take your threaded needle that has a knot at one in and sew the three loops together.

When you are sewing the bow together you are trying to scrunch up the middle. It doesn't have to be perfect because we are going to cover this anyways.


I then wrapped the rest of the thread around the center of the bow to secure it. Once your center is secure use your best judgement and arrange the bow as you like.
Now using your hot glue and smaller piece of ribbon you are going to cover your alligator clip. Starting on the inside bottom add a small amount of hot glue and secure the piece of ribbon.

Now glue and secure the ribbon around the outside bottom.

Continue wrapping it over the back and glue to the top.
 Finish gluing to the inside top of the clip. You will want to hold the clip open just for a few seconds until it finishes drying. Remove any stray glue strings.

The next few steps is where I start to feel like I didn't take enough pictures. This is probably because I was trying to figure it out as I went. Essentially what you are going to do is use the last little bit of your smaller piece of ribbon (you may need a third piece) to secure the ribbon to the alligator clip and around the center of the bow.
Start with a small dab of glue on your clip. Use your bow as a guide beforehand to decide where this should go. Then secure your bow to the clip. Then using the small piece of ribbon and glue wrap the ribbon around the bow and clip finishing underneath the inside top of the clip.


I have not had a chance to have Emily model the bow for me and though having one of the boys do it would not go over so great with their dad so I will wait until she gets home from school and add the last picture. Have fun bow making!!


 Then you stack the diapers in a circle around the bottle. I wrap a large rubber band around each circle to help give it more stability.
 When you get to the largest circle you may need to wrap the circle in sections with the rubber band. Our rubber bands were OK to go all the way around each circle until the large layer. Then we wrapped half of the diapers with one band covering the bottle and then the other half (also including the bottle from that side) with a second band.





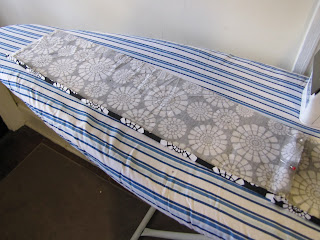

 Sew your hem.
 To make the skirt have a little bit of a ruffle to it the next step is to baste the fabric. Essentially this means to sew a very loose line of stitches so you can gather the fabric. You will want to sew two lines just to make it more sturdy. Nothing is more frustrating that gathering the fabric to have the thread pop. Set your stitch controls to be the longest stitch possible and sew a line close to the edge of the fabric. Don't worry if your fabric starts to gather on it's own.