Supplies for Skirt:
Pair of old jeans
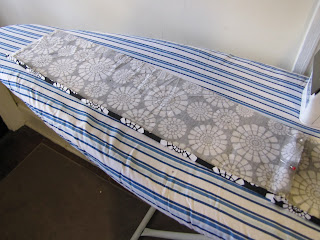
*2 strips of fabric 24x6 inches (I used scrap fabric so I had to sew two strips together...if you have enough to make it 48 inches long you will be able to skip a step)
thread
pins
sewing machine
sissors
Supplies for Shirt:
Shirt
Fabric large enough for your design
Wonder Under
Iron
Thread
Sewing Machine
Pen
To start cut your jeans at the crotch level so that it is open like a skirt. I used 6 inches wide strips because I measured the skirt on Emily and determined that to be a good length for her. You will want to measure your child and adjust accordingly.


The next step is to press your fabric. Besides getting your wrinkles out you want to press your fabric for a hem on the bottom. To do this turn your fabric about 1/4 inch and press.

Then turn the fabric over again and press. This will make sewing your hem so much easier.

Then you will want to sew your two seperate pieces together.
 Sew your hem.
 To make the skirt have a little bit of a ruffle to it the next step is to baste the fabric. Essentially this means to sew a very loose line of stitches so you can gather the fabric. You will want to sew two lines just to make it more sturdy. Nothing is more frustrating that gathering the fabric to have the thread pop. Set your stitch controls to be the longest stitch possible and sew a line close to the edge of the fabric. Don't worry if your fabric starts to gather on it's own.
 Then sew your second line.
Once both lines are stitched start to pull the strings gently to gather the material. I always over gather as I find it easier to let it out later than try to gather it more.
 Using the jean skirt as your measurement gather until it seems about right. Then you will want to sew your two ends of fabric together to create a circle. When I first made this I didn't do that step and had to sew the ends together after I had it pinned. It worked much better the second time I made this skirt to sew it first. Just make sure your basting strings are not sewing in so you bunch some more or let it out as you need to later. From here you just pin the gathered fabric to your skirt right side together.
Make sure you adjust your settings back to normal before sewing.

Then sew your fabric to the skirt.

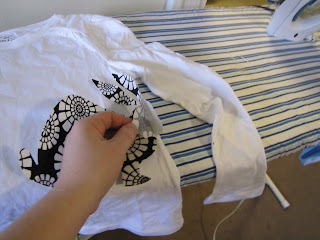
To make the shirt I printed the bunny off of my computer using a clip art. Then I traced the bunny to my wonder under. Wonder under is found at any fabric store and is basically an iron on. I then ironed the wonder under to the wrong side of my fabric. Then cut out the fabric.

Next peel the back piece of wonder under off the fabric and iron it to your shirt. I don't have a picture of the next step but you simply zig zag stitch around the entire shape.


No comments:
Post a Comment